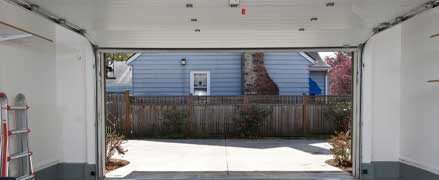
Garage Floor Installation
When it comes to installing a new garage flooring there is a lot to take into consideration. There are many different types of garage flooring options to choose from and each comes with its own unique installation process. Having a better understanding of the installation process of each garage flooring option can give you perspective so you can decide if you want to make it a do-it-yourself project or hire a professional and so you can understand the materials and price involved in the installation as well. Having this understanding can also help you decide which flooring you want to install in your garage and what will work best for your garage. Here we will visit the different options you have for your garage flooring, the preparation involved, and the complete installation process.
Concrete Paint
Concrete paint is an easy way to add a pop of color to your garage to create a whole new look. This option offers easy preparation and easy application making it a great option for a DIY project.
Free Quote
Fill out this form and someone from our team will be in touch with you shortly.
Preparation
For concrete paint the preparation of the surface is simple. Start the preparation by washing the surface. You want to be sure that the surface is free of any grease or oils that could discolor the paint or prevent it from an even coat. Once the floor is completely washed you have to ensure it has dried completely and no moisture is present. This is important in making sure the paint adheres to the surface without bubbling or chipping away later. Next, you’ll want to sand away any existing paint or uneven areas for a nice smooth surface. This includes filling any cracks or imperfections and finish by doing a final cleaning of the floor.
Applying Concrete Paint
Once the surface is completely prepared it is time to get the paint applied. Some garage floor paints come with a primer already mixed in, if your paint choice does not then this step is crucial. Apply a primer coat to the flooring. This first coat of primer will help the color stand out and last. After the primer has been applied and is allowed time to dry you can apply your first coat of paint with a clean roller. Most paints will take 2 coats of paint but it should be noted that each coat needs to be completely dried before the next coat is applied. Once all coats are applied and have had time to dry entirely you can seal the flooring with a masonry sealer.
Call For a Quote:
844-482-8330
Concrete Stain
Concrete stain is a beautiful way to add color to your garage floor that will last. There are two types of stain whether you choose a water-based stain or an acid-based stain there are similar application processes.

Preparation
It doesn’t matter if the concrete surface is old or new, there is the preparation that needs to be done to ensure the stain will last. Unlike paints, stains are translucent which means any type of stains like grease on your concrete or even cracks and chipping, will show through to the surface. For the preparation of this surface, you can either choose to use a specialty cleaner or mechanically grind down the surface. Whichever option you choose be sure to follow up with cleaning the surface entirely.
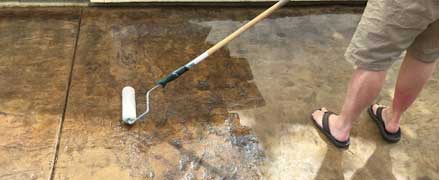
Concrete Stain Application
For this application, you start with masking off the area to protect things like door frames and walls. After this is complete you can prepare the stain for the application. Next, using either a sprayer or brush, the stain will be applied to the flooring. The stain will then be allowed to dry which generally takes anywhere from 15-20 minutes. If a richer color is desired, after the first coat dries you can apply more coats as desired allowing each coat to dry between applications. While it takes only 15-20 minutes for the surface to be dry to the touch, keep in mind the total cure time is 24 hours. After the stain is applied rinse with water, neutralize the stain (if an acid-based stain was used), and then give a final rinse. The final step is to seal the concrete that has been stained to not only give great durability but to also protect the surface and give a great shine.
Call For a Quote:
844-482-8330
Garage Floor Epoxy
Garage floor epoxy has become an increasingly popular flooring option not only because of its strength and durability but also the many different ways that this flooring can be personalized. This flooring is easily cleaned and maintained while being guaranteed to last for 20 years or more with the proper preparation for the surface and installation.
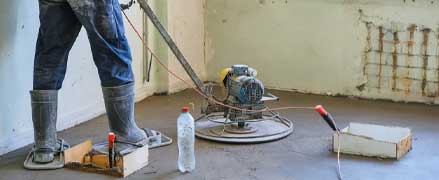
Preparation
For garage floor epoxy it is incredibly important to do all the necessary prep work to ensure the proper bond of the epoxy to the concrete. Without the proper preparation of the surface, the epoxy can fail and won’t give the strength and durability or last as long as it is intended to. The preparation of this surface includes a thorough cleaning and repairs to the surface. Next, the surface will be ground down with a diamond wheel blade to ensure the concrete is porous and will give a superior bond for the epoxy. Finish up the preparation of the surface with a final cleaning which can include vacuuming or rinsing the surface making sure the surface is completely dry before the application process begins.
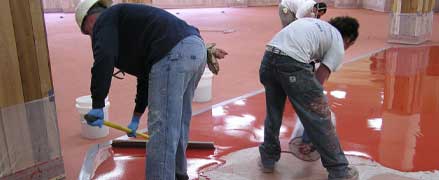
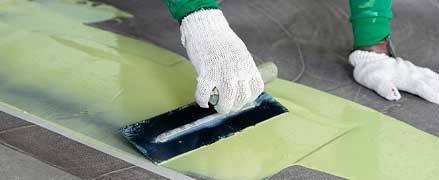
Installation of Garage Floor Epoxy
After the proper surface preparation has been completely the epoxy will then be mixed. The first coat will be the primer for the epoxy giving a good base for the epoxy. After the primer, the mixed epoxy will be poured and applied to the surface using squeegees. This first coat typically takes anywhere from 10-24 hours to dry enough before the second coat can be applied. The second coat will be applied and this process repeated until the desired thickness is achieved. Once the desired thickness is achieved and the epoxy has had adequate time to dry it is time to add the topcoat to give added strength, durability, shine, and even a slip-resistant surface.
Call For a Quote:
844-482-8330

Hiring the Right Professional
While it may seem some of these installation processes seem simple it is important to hire the right professional for your garage floor installation. You may not want to spend the extra money on hiring a professional but it can actually save you money in the long run. A professional knows all the ins and outs of garage floor installation backed by years of experience. Hiring a professional for your garage floor installation ensures safety as professional contractors are licensed, bonded, and insured.
Let Us Help You Find the Perfect Contractor for Your Garage Floor Installation
F.A.Q.S
About Polyvinyl Chloride Garage Flooring
What is the installation like for PVC Rolls and Tiles?
PVC rolls and tiles don’t require a lot of surface preparation. To prepare this surface a simple cleaning is all that is necessary using a mop and broom. These tiles and rolls just require to be laid in place without the use of adhesives.
What determines the price of my installation?
The price of your flooring, as well as your installation, depends on a few different factors. For the most part, the price comes from the combination of preparation of the concrete that needs to be done for the flooring and the size of the space. If you have a larger space that requires a lot of preparation you can expect the price to be higher than that of a smaller space with limited prep work requirements.
How long will it take for my garage floor installation?
The time frame of your installation depends on different factors such as the extent of the prep work needed, the type of garage flooring chosen, and of course things like temperature and weather conditions. Depending on the type of flooring you choose for your garage this process can take anywhere from 5 hours to 2 days. Your garage floor installation professional can give you an accurate timeline of what to expect.